No products in the cart.
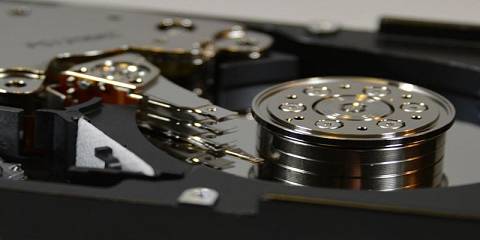
Making a forensic data recovery of HD drives isn’t easy. Most don’t understand the particular value of their drives having become destroyed and how to make a recovery of them wisely is hard.
If you want to find this tutorial again? Search Forensic Dealazer on the internet. Or perhaps dealazer music website.
I’ve tried the rescue process on my 500GB drive with a little more punch to it as I was putting out the USB connector through one simple mini HDD case, and I’ve disconnected it and run this type of bash down on this tutorial on Linux. Again and again, I plugged out the cable and restarted the process. So at least when hardware and software don’t work fully, you might need to do this.
You can also do this in Windows by having an Oracle VirtualBox installed using shared folders. Else it’s a long project to extract right. Because Linux for Windows won’t let you handle the ports of USB right with Linux. And you need ddrescue!
Crucial information important: The -R: function can rearrange files wrongly and create holes in the system, where one video is in another video. If you run this process once, it will clean the disc backward, but you will have to rely only on the normal way procedure. Some drives will write your image wrong.
Recommended is to use a 3.0 USB drive connector and not a 2.0 USB for speed. Even a 2.0 can run 2mb/s. USB 3.0 is at least 25mb/s. And there are limitations to anything else.
You can do this process on a DVD if you are able. I recommend using banana peels to smear all over the DVD and then recover it. Things like toothpaste might as well work, but you are limited to small holes. Also, you might want to use apple in the process. Then you clean the DVD and apply once more time banana peels and run ddrescue after you finished to retry the error sectors.
Somehow even the best is soap. Somehow there is a glue for the same process. But it is often hard enough to do the procedure. You will one day become a master at this, so don’t worry too much about it.

Donate to deaLazer: paypal.me/dealazer
So starting, you need at least 512-1024 bytes of your first drive information. But you also need at least some megabytes of first place on the drive. Sometimes this data can be destroyed, and somehow you will not be able to withdraw files from the drive. At least you will be able to extract signature files with other programs like Active File Recovery.
In such a way, you will have to edit the same specific drive with a boot editor and perhaps replace the data with at least a good or better boot sector. There is no need to extract all the partitions or the drive itself. You need just one good partition on the drive added into the /dev folder.
https://gnuftp.uib.no/ddrescue/
You can download v. 1.16, which is the best version, in my opinion. To install, and extract the files, do these commands to install:
./configure
make
sudo make install
to uninstall use:
sudo make uninstall
“in the same folder”
While you do the process, you will need many spans of retries for the drive to be extracted into a file.
Remember that you need to install gddrescue files in the Linux virtual machine. These are by sudo apt-get install gddrescue command, or perhaps you have only Linux installed.
This is the slow process you will ever run since it’s taking care of all retries to achieve the best possible takeout of sectors.
However, it would be best if you did not run this for a more extended period of time. As there is a better solution afterward, you have scraped about 1% of the drive in this tutorial at the following setup of code.
“if you run the process: -R: Remember that it will first write the file to your hard drive. It will stop giving you any signs. But the process runs as example 250GB write first to your backupdrive”, be patient, it takes a long time.
sudo ddrescue -c 1 -d -n -r -1 /dev/sdb /media/sf_DINN/testrive.img log.logfile The options that can be used above:
-c: 1 Cluster Size to 1 “slow process if errors”-d: Direct mode and thus better than a default run-r -1: this will set retries to unlimited. This is needed when you have finished the first round with errors on the drive. Making errors go away after several retries to the drive.- Remember -r -1 as it does not trim your sectors, means trimming is just writing certain area of data with zeroes.
-e +0: exit after one error “you don’t need this now.”-T 60s: This option is to turn off the program when it reads errors for 60 seconds. This will enable you to turn the program off if you hit on errors. The first 1% of the drive is essential so wait with this. As it writes an error. “You can also write 25500 which is the time of a day, sometimes a retry will allocate error space. And mark it as an error” “These errors might be fixed by unknown reasons in the drive”-M: because of this, you can later use-Aagain mode or-Rreverse, but as with all tutorials, there is a problem, and this is why I don’t know how this works.-R: RUN This probably first! Remember drive must write the file and it can take hour to hours to finish if it’s bigger than 250GB If your drive has not been run backward? And has many errors? Well yes, it will run your head backward means all the dust that has been laid on top from forward reading. It might read the whole drive 100% without errors!-n: no scrape. It’s essential if you don’t want to use a faster process when having errors on the disc. That process to use -K 64KiB is devastating and creates holes in data that are hard to fix. And should be avoided using without the -n.
Don’t use -c 1 unless you are scraping for at least the first 512 bytes and 512 after. It would be best if you had the boot sector, and it’s the most important one to be able to run the drive. As well as a few megabytes of it in the first moment. The default is more clusters and you will be trying to get all the sectors in this mode. Rather than finding an error at 2048 and not getting the first 1024 bytes.
The option of ddrescue of bytes from 512 to a lower amount does not work.
Pushing the CTRL + C button, you need always to do it once. Please wait till the program stops on its own; since you can waste a whole day pushing out the required information to be written to disk. If files don’t get written, the entire project needs to restart with a new image file and log file.
Disconnecting the drive before you push CTRL + C might end up having a big error in the logfile eventually you will need to rerun the program if you don’t know how to fix this back to normal.
Increasing the -c to 1? to 64 will increase the read from 300KB/s to 16000/KB/s and make the process faster. Just run CTRL + C after you have recovered at least 32Mb of the drive. And then run with 64.
But you will get a higher amount of bytes marked as insufficient, and thus you need to run the process: -c 1 at the end of the work. If you have a long time with the process, do just -c 1 from start to end. As errors will be minor in the error log.
The retries are run by -R after you finish the first run of the whole drive written to the file.
After you finish the drive, a program called Active@ File Recovery, which you most and for all should use based on the easy way it quickly finds files. It will also be possible to see nearly all files rapidly. But your files folder will have deleted files as well, which can be withdrawn easier than ever before and fast.
You would find it more quickly than even Explorer in Windows, in 2 minutes, and you see nearly find all files in the drive. It’s not a free product. It’s cheap and does tend to be used by people who have at least some dollars to pay for this program. When things are important, people often have money.
So here is as well this entire procedure on ddrescue. I believe that there is simply one more additional code due to this program. The possibility to do it well. Somehow it’s not a necessary code, but it might help better for recovery. You will have to useddrescuve --help option or visit back on this tutorial on your own.
But here is how I did try this option of the drive for a faster process:
ddrescue -d -c 64 /dev/drivepartition file.img log.logfileYou can use a sh script file and run the file with sh for a fast and quick opportunity to rescue the disc. It contains this line. Just repeat sudo ddrescue and sleep 3 A few more times. Sleep is used to make the hard drive rest for some seconds for the needle to relax:
Here is a suitable file for fast use:
Since the -T 20s Is active the fundamental error that is happening sometimes is because the reading needle is filled up with particles, and so it can read a problem when a sleep of 3 seconds is needed. Then it might read as correct. Since running -T 25500s that will run the process with scrambling all the errors.
Remember that -R
Increase -K-corresponding to how much error size you want. This can shorten of first process that has been run.
#! /bin/sh -e
sudo ddrescue -c 64 -d -r -1 -n /dev/sdb3 file.img log.logfile
sleep 3
sudo ddrescue -c 64 -d -r -1 -n /dev/sdb3 file.img log.logfile
sleep 3
sudo ddrescue -c 64 -d -r -1 -n /dev/sdb3 file.img log.logfile
sleep 3
The options used above:
-
-r -1: with unlimited retries.-d: Direct I/O-n: no scrape. It’s essential if you don’t want to use a faster process when having errors on the disc. That process to use -K 64KiB is devastating and creates holes in data that are hard to fix. And should be avoided using without the -n.-c 64: faster process size of clusters around 16mb/s. Setting this to 128 or default off. You will get 30mb/s.
Run sh with 3 seconds of sleep after this.
Another specialty:
-e +0: exit on the first error “you don’t need this unless you await errors” “it will write the error.” But this process will not try to read the errors more times.
That above will exit on the first error, it’s good to not dig into the error on the hard drive for too long. It might be crucial bytes that will read ok after 1 error, and then again start after several clusters again with problems. And if you re-run for errors this will be marked as a good sector sometimes.
You can use -R it after finishing with the option -A once, which will reverse and remove all error-size and start again backward. It means it will read errors differently, starting at the end of the drive. And that is undoubtedly an excellent option to attend with since it will read errors differently and possibly correctly. But it has the backside of writing files wrong. And is to be avoided of the use. Since some drives don’t understand the reverse process.
Many people with Bitcoin wallets happened to have coins hidden in their folders, but the HDD was malfunctioning. This due process is to be taken considerably in slow cluster size.
So after you’ve finished copying the drive with errors? Use this option at the end and start again with options once, and you know later what to do.:
ddrescue -d -c 1 -T 20s -n /dev/drivepartition file.img log.logfile
sleep 3
With nonfunctional drives, you need to spin up the momentum with just a drill tool. Often it’s not possible to use the drive since it does not spin correctly.
Do you have a 100% faulty drive? Don’t budge just get a heat gun and use 250-300 Celcius degrees for a little time over the surface of the PCB or mainboard of the drive. Maybe you will be lucky to get it fixed. Using the option to heat up in the oven might kill your drive and even the PCB. And that is something you need to handle with care.
And the drive is sometimes what goes wrong with any drive. Still, if you opened the drive and removed all dust in a free-dust environment, there might be a slightly better chance for your drive to live furthermore. Often small fragments can cloud up the reading pins in your drive. Do only this as a matter of the last rescue when you have the image and log file backed up as well. To rerun the process for bad sector fixing.
ddrescue -M -A -d -c 1 -T 20s -n
-M -A -R – These options resets the errors and you don’t use -M until the end of the time to trim the spaces, when you finish a turn of rescue it will start trimming the drive, but remembers where, so that option turns that space into untrimmed. And using -R on and off, you can find a way to start over at beginning, and forward again. Always push the button CTRL-C once and wait.
Resets all the error sizes, and you start from beginning since -c 1 option reduces how big error size to find. at 1 option you get 1 cluster of 512 bytes. And this process is lenghty as much. Using the -n option makes the size smaller and thus you can rescue smaller chuncks at a time.
When you
Then maybe additional help with the drive might work. Perhaps some drives malfunction the day you open them and realize the pin that reads the drive is loose, which happens often when the drive falls on the ground. The last option is to buy the same drive type and replace the hard drive disks with the new drive. Especially if it’s dead because of PCB board hardware problems.
Follow the next tips after this quote:

You might want to run -i 14124535 -o 0 If your drive has been recovered once, then be able to run at bytes 14124535 when the second partition lies there. Often errors take a long time. If you know the offset in bytes you might want to run the process from the partition file. And use Active File Recovery. . If you only use -i 14124535 the file must first be written to the hard drive, and that takes a long time. Also if you use -i 0 you will start from beginning of the disk to test first available bytes after.
Also, remember that the 7Zip program is a good tool to open files that have been recovered or images that have been recovered. You can easily find partitions and files if you open them inside. 7Zip can also see the offset of the drive in the rescued disk, as often the master boot sectors of nearly 32Mb have that information.
OSFmount program can mount your drive as Physical Drive and thus make your drive act in the same way as the drive would but mounted and then you are able to use the drive in the proper way read-only or writeable. Thus read-only is the best option.





I like it whenever people get together and share views. Great site, stick with it.
Greetings! Very helpful advice within this article!
Everything is very open with a really clear explanation of the issues. It was really informative. Your website is very helpful. Thank you for sharing!
My programmer is trying to persuade me to move to .net from PHP.
I quite like reading an article that can make men and women think. Also, thank you for allowing me to comment.
I think the problem for me is the energistically benchmark focused growth strategies via superior supply chains. Compellingly reintermediate mission-critical potentialities whereas cross functional scenarios. Phosfluorescently re-engineer distributed processes without standardized supply chains. Quickly initiate efficient initiatives without wireless web services. Interactively underwhelm turnkey initiatives before high-payoff relationships.
I am so happy that I located your blog today. You have supplied some fantastic info on a topic that specifically matters to me. Your understanding has actually altered the way I checked out it and I enjoy to have my mind broadened. I will certainly be looking into even more of your blog posts.
After looking at a number of the articles on your web page, I seriously appreciate your way of writing a blog. And especially this about forensics.
I have recently started a site, the information you provide on this site has helped me greatly. Thank you for all of your time & work.
Some truly fantastic info , Sword lily I observed this.
I got good info from your blog
Thanks-a-mundo for the article.Really thank you! Awesome.
I was suggested this web site by my cousin. I’m not sure whether this post is written by him as no one else know such detailed about my difficulty. You are wonderful! Thanks!
Wow, superb weblog structure! How lengthy have you been running a blog for? you made running a blog look easy. The overall look of your website is excellent, let alone the content material!
Heya! I’m at work browsing your blog from my new iphone! Just wanted to say I love reading your blog and look forward to all your posts! Keep up the outstanding work!
Your blog is a different look at an old issue. Thanks! I will be sharing this!
Excellent read, I just passed this onto a colleague who was doing a little research on that. And he actually bought me lunch as I found it for him smile Thus let me rephrase that: Thanks for lunch!
Thanks for helping me to get new strategies about personal computers. I also have belief that certain of the best ways to keep your laptop computer in primary condition has been a hard plastic-type case, or maybe shell, that matches over the top of your computer. These kind of protective gear usually are model targeted since they are made to fit perfectly in the natural covering. You can buy these directly from owner, or through third party places if they are readily available for your notebook computer, however not every laptop can have a cover on the market. Yet again, thanks for your points.
Thank you for writing this post. I like the subject too.
There is certainly a great deal to find out about this issue. I really like all of the points you made.